Are you facing an HTTP Image Upload Error on your WordPress website? If yes, then this article is for you. Here in this article, we are going to help you solve this problem entirely. Well, WordPress is a relatively stable platform for all types of websites, we face those annoying problems because of our misconfiguration.
Mostly the HTTP Image Upload Error occurs when we try to upload new media using the default WordPress media library. And the error becomes challenging to fix when we don’t know the actual cause. Below we have shared the complete solution with step by step instructions, follow the instructions carefully.
Before going to the solution, it is important to know the primary reason behind this error. From my experience of about 10 years, I can say that these errors mostly comes from two things:
- Client-side or user error
- Problem or setting on your WordPress host
Client-side or user error include the login session or the bad characters in the file name. And the server-side consists of the servers error, memory list, third party plugin, lack of resources (mostly we found it in the shared hosting),
Here is the list of thing which you need to check to solve it.
- Compress or Resize the File
- Remove All The Bad Characters And Symbols In Image Name
- Temporarily Deactivate Plugins and Theme
- Increase PHP Memory Limit
- Fix Performance Issues with Imagick and Shared Hosts
- Remove Custom Media Library Path
- Disable mod_security
- Check Uploads Folder Permissions
- Move to the Latest Version of PHP
- Contact Your Hosting Support Team
Table of Contents
Instructions To Fix HTTP Image Upload Error In WordPress
1. Compress or Resize the File
Very high image resolution and size can be the reason behind HTTP image upload error. If you are trying to upload an image of high resolution, then we recommend you to resize the image and compress it. And then after that, try to upload the image.
You can use Photoshop and Canva to resize or edit the image, and for compressing the image, we suggest you use tinyjpg.com. There are tons of WordPress plugins available that can automatically do the same work of resizing and compression just after uploading the new image.
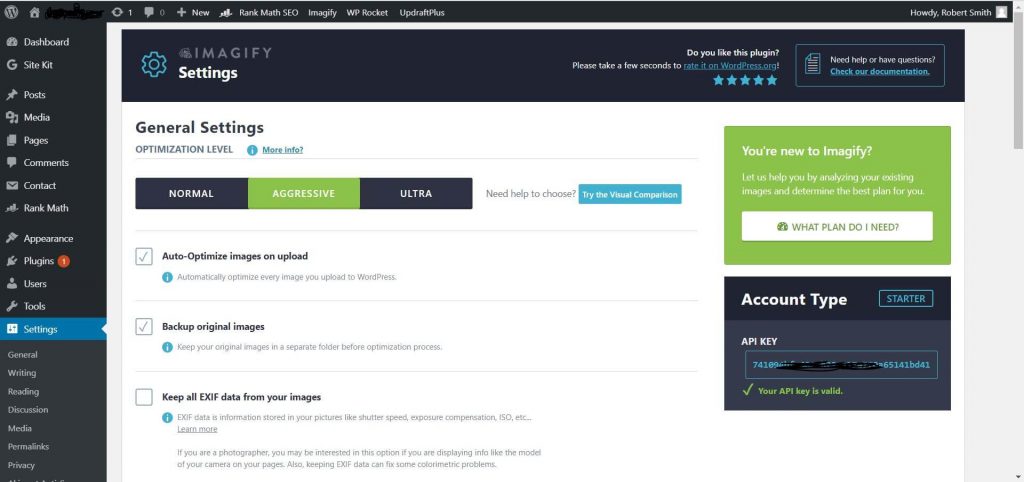
Talking about the plugins, we suggest you use Imagify, Imagify is one of the most used plugins on WordPress when it comes to image optimization. It’s a paid plugin, you need to pay for the subscription but don’t worry, Imagify also offers a free plan. In the free plan, you can optimize 200 images per month.
Instead then Imagify, you can also use other WordPress plugins including,
- Optimole
- Smush Image Compression and Optimization
- EWWW Image Optimizer
- ShortPixel Image Optimizer
- Compress JPEG & PNG images by TinyPNG
2. Remove All The Bad Characters And Symbols In Image Name
Lots of time, our content contains special characters like “%^%$#%&,” and we also try to use them in the image name for SEO optimization. Yet, those special characters are possible reasons for the HTTP image upload errors.
If you are trying to upload an image that contains special characters in the name, then rename the images to fix the issue. WordPress supports special characters in the image name, but because of some reason, those errors appear sometimes.
3. Temporarily Deactivate Plugins And Theme
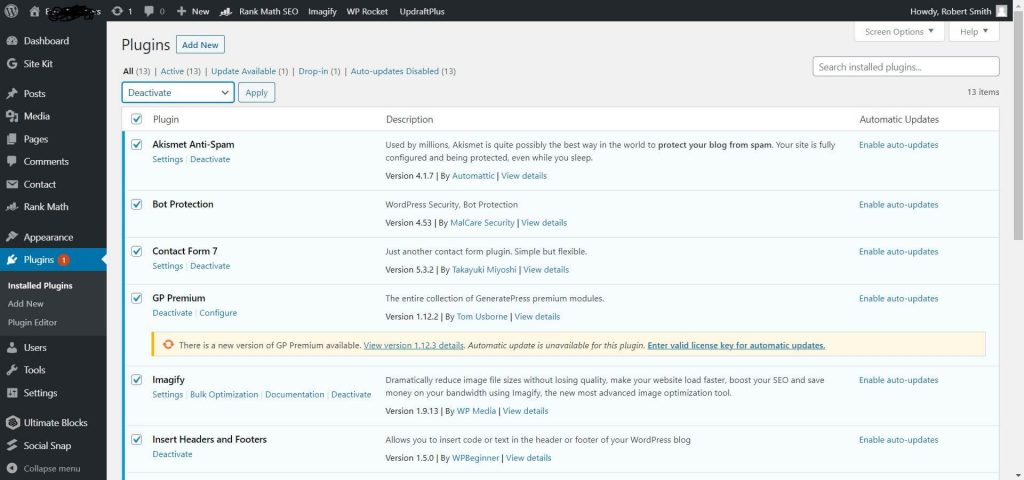
Corrupted WordPress theme files, plugin files, outdated or corrupted image optimization plugins, or security plugins may also be the reason behind the HTTP image upload error. It is highly recommended you update your WordPress installation to the latest version available along with updating all the installed plugins.
After the update is completed, try uploading the image once again. The error would be resolved.
If it persists, disable all the plugins and activate them one by one until the error occurs again to identify the one that was causing the issue. Usually, security plugins or image optimization plugins are the culprits.
4. Increase PHP Memory Limit
HTTP image upload error may also arise if there is a lack of available memory for the upload process to complete in the background. You need to check and increase the amount of memory used in the process. We recommend you to set 256 MB.
The PHP memory limit is already 256 MB for most of the leading hosting company, but if your website is hosted on local or cheap shared hosting, it is important to check and increase manually.
You can increase the PHP memory limit in a few different ways, including using the wp-config.php file, using MultiPHP INI Editor in cPanel, by making changes in php.ini file, and you can also do it by modifying the .htaccess file.
Let’s understand the complete process one by one.
Increase The PHP Memory Limit Using wp-config.php File
Follow the below process to edit the wp-config.php file.
Step 1: First of all, login into your web hosting account.
Step 2: Go to file manager and locate your website folder. If the single website is hosted on your server, then public_html is your website’s root folder.
Step 3: You will get the file named wp-config.php. Right-click on it and click on edit.
Step 4: Now, what you have to do is add the below code in the file and save it. You are done.
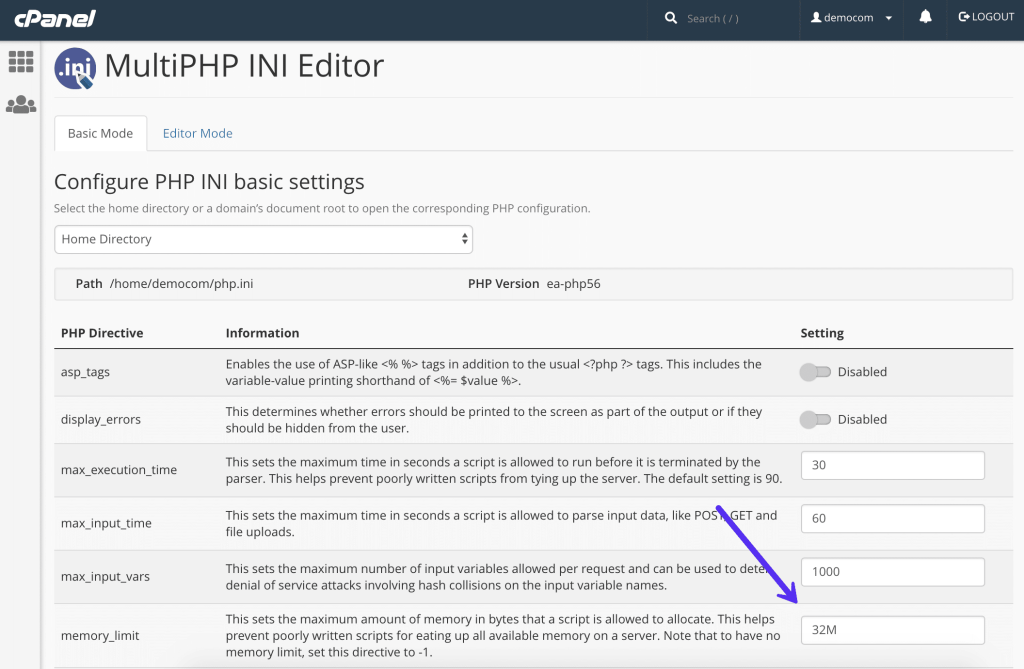
define('WP_MEMORY_LIMIT', '256M');Increase The PHP Memory Limit Using MultiPHP INI Editor
Follow the below process to be done with it,
Step 1: Log in to your hosting control panel.
Step 2: In the software section, you will get an option as “Select PHP Version.” Click on it.
Step 3: Now scroll down, edit the memory limit to 256 MB, and save the changes.
Increase The PHP Memory Limit By Editing php.ini File Or .htaccess File
You can also increase the PHP memory limit by manually editing the php.ini file or .htaccess file. You will get those files in the home directory of your WordPress files. The memory limits will be mentioned within these text files that you can edit manually.
5. Fix Performance Issues With Imagick And Shared Hosts
This part is a little bit technical, but we have tried to explain it in the most straightforward way we can. For the image process on the server, WordPress uses two different PHP modules,
- GD Library
- Imagick (ImageMagick)
WordPress uses anyone of them, it totally depends upon what is installed on your server.
You may also face an HTTP image upload error if your website is hosted on shared hosting and the hosting company has given very few resources to Imagick. Mostly the hosting companies limit the resource to multiple threads.
Don’t worry, you can quickly solve it. You have to add the below code at the top of your .htaccess file, this file is located in the WordPress installation folder. When you add the below code, it will change the value to a higher number.
MAGICK_THREAD_LIMIT 1Rather than changing the value, you can also set the GD library as the default, add the below code in your themes function.php file, and you are done.
function wpb_image_editor_default_to_gd( $editors ) {
$gd_editor = ‘WP_Image_Editor_GD’;
$editors = array_diff( $editors, array( $gd_editor ) );
array_unshift( $editors, $gd_editor );
return $editors;
}
add_filter( ‘wp_image_editors’, ‘wpb_image_editor_default_to_gd’ );
6. Remove Custom Media Library Path
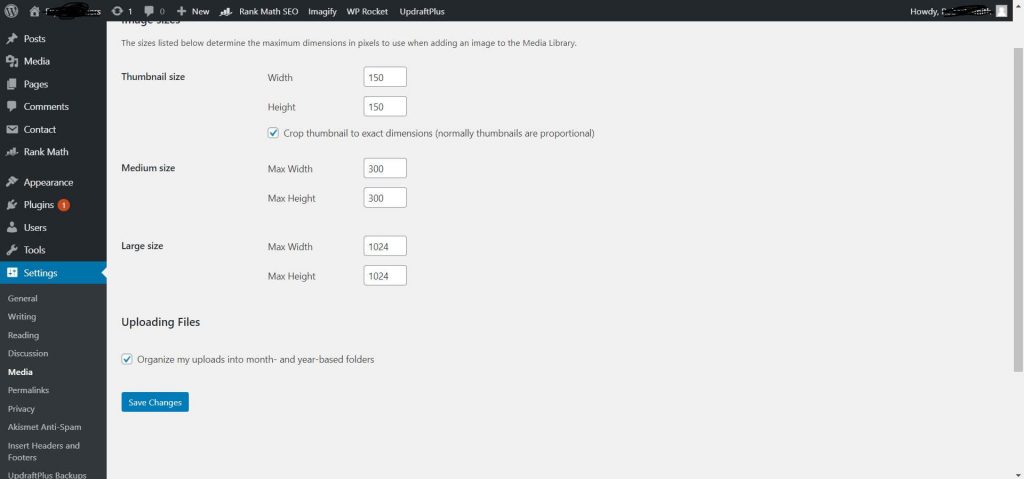
Only check this setting if you have recently migrated your website from localhost to server. Most of the time, when web developers take their websites online, sometimes this setting changes automatically.
Login to your WordPress Admin >> Go to Settings >> And then Click Media. If you are getting everything shown in the image above, then everything is fine, but if there is any path listed, you need to delete it.
7. Disable mod_security
We suggest you to try uploading the image by disabling the Mod_security. Talking about it, Mod_security is the open-source firewall. Here is how you can disable it,
To disable it, add the below code at the starting of the .htaccess file.
<IfModule mod_security.c>
SecFilterEngine Off
SecFilterScanPOST Off
</IfModule>
You can also visually disable Mod_security if you are using cPanel. Log in to your web hosting control panel >> Scroll down, you will get the option as Mod_security under the security tab, click on it >> Turn it off.
8. Check Uploads Folder Permissions
As you all know, all the images, videos, and other media uploaded on WordPress websites are stored in the folder named Uploads. Virus and Malware in plugin or theme files change the folder permissions, which results in HTTP image upload error.
You can quickly check the folder permission from cPanel or FTP software. If you cannot do it, you can also ask your host to check and fix the problem.
9. Move To The Latest Version Of PHP
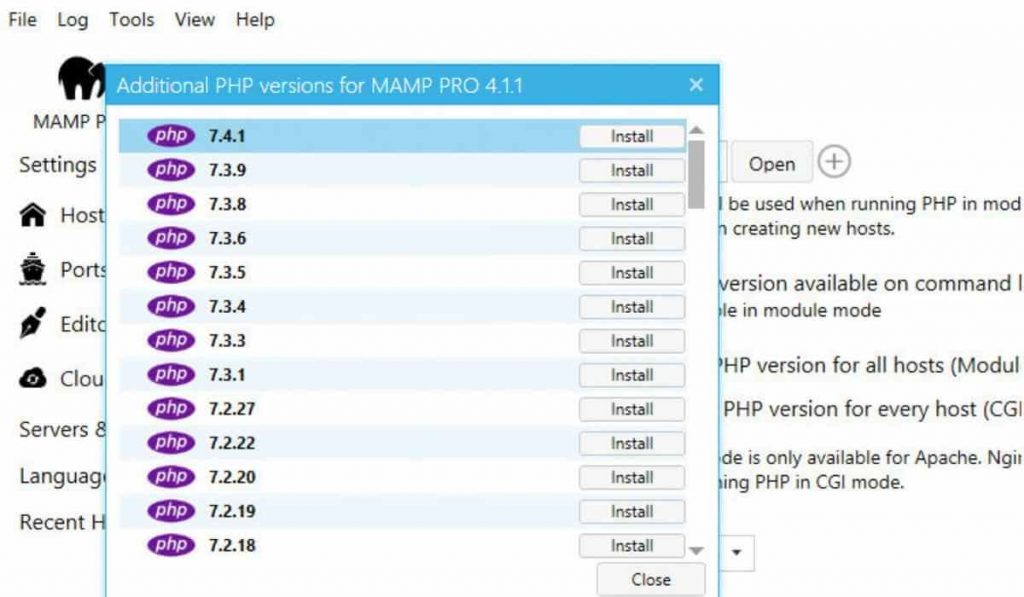
It is always better to run your website on the most recent PHP version. Even WordPress officially recommends PHP version 7.3 or higher. Upgrading the PHP version is not just limited to solving HTTP image upload errors but offers you better performance and security.
You can change the PHP version in one click if you are using cPanel. Follow the below process to change the PHP version,
Step 1: First of all, login to your hosting control panel.
Step 2: Scroll down, you will get the option “Select PHP Version” under the security tab. Click on it.
Step 3: Now select the PHP version and click on Set As Current.
Done, that’s how easily you can change the PHP version.
10. Contact Your Hosting Support Team
Even after compressing, resizing, renaming images, checking all the plugins, increase PHP memory limit, checking uploads folder permissions, moving to the latest version of PHP, and doing all the stuff mentioned above, if you are still facing the same problem, then it may also be an issue with your web hosting.
We recommend you to contact the WebHost, your Webhosting support team will, for sure, help you solve your issue. They will recommend you upgrade the hosting package if it is happening because of a lack of resources.
Almost all the hosting companies are currently providing 24/7 support over call, email, and live chat. If you are not getting the right support from your host, it’s time to change the hosting. We suggest moving your website to Cloudways, Dreamhost, Hostinger, Bluehost, Nexcess, or WP Engine.
Final Words
We hope that after performing the above solutions, your problem is solved. Wrong WordPress configuration may lead to such errors. It is better to properly step all the things from WordPress setup to plugin and theme configurations.
If this article about Fix The HTTP Image Upload Error helpful for you, then do share it on social media. Please stay connected with us for such informative posts.
Further reading: